Build and deploy Docker images with Github Actions
In the CI/CD tools ecosystem, there are plenty of ways to build and deploy Docker images. In this post, we’re going to explore how to do that task using Github Actions.
What is Github Actions?
If you are here, I assume that you know about what is Github, but maybe you don’t know anything about Github Actions. Github Actions allows the creation of custom workflows, including CI/CD, composing different tasks packaged as actions. You can find these actions on Github Marketplace.
As said, throughout this post, we’re going to make a workflow that will build a Dockerfile and push it on Dockerhub.
Step 1: Push a Dockerfile
First of all, we need to create a Github repository and push our Dockerfile inside. For this post, we’re going to create a ‘hello world’ Dockerfile. Copy the below snippet into your Dockerfile.
| |
Step 2: Create a Docker repository on Dockerhub
The next step is to create our Docker repository on Dockerhub. If you don’t have a Dockerhub account you can sign up here. For the purpose of this post I’ve created my hello world repository that is named ‘z0beat/hello-world’ (I’m a naming genius).
Step 3: Create Github Actions
With these two things ready, we only need glue things together using Github Actions! To do that, we’re going to create a file on our Github repository on the path ‘.github/workflows/push-to-dockerhub.yml’ with the content below.
| |
The workflow is named Build and Deploy the image to Dockerhub and will be triggered on every push event on the Github repository. It is composed of one job, named ‘Build and Deploy image’, that will run on a worker with the ‘ubuntu-latest’ operating system. That job is composed of two steps:
The Checkout is the step clones your repository into the worker which will be used in the following step.
The Build and push image step builds the Dockerfile, creates the ’latest’ tag, login into Dockerhub using DOCKER_USERNAME and DOCKER_PASSWORD as credentials, and push the image in the repository.
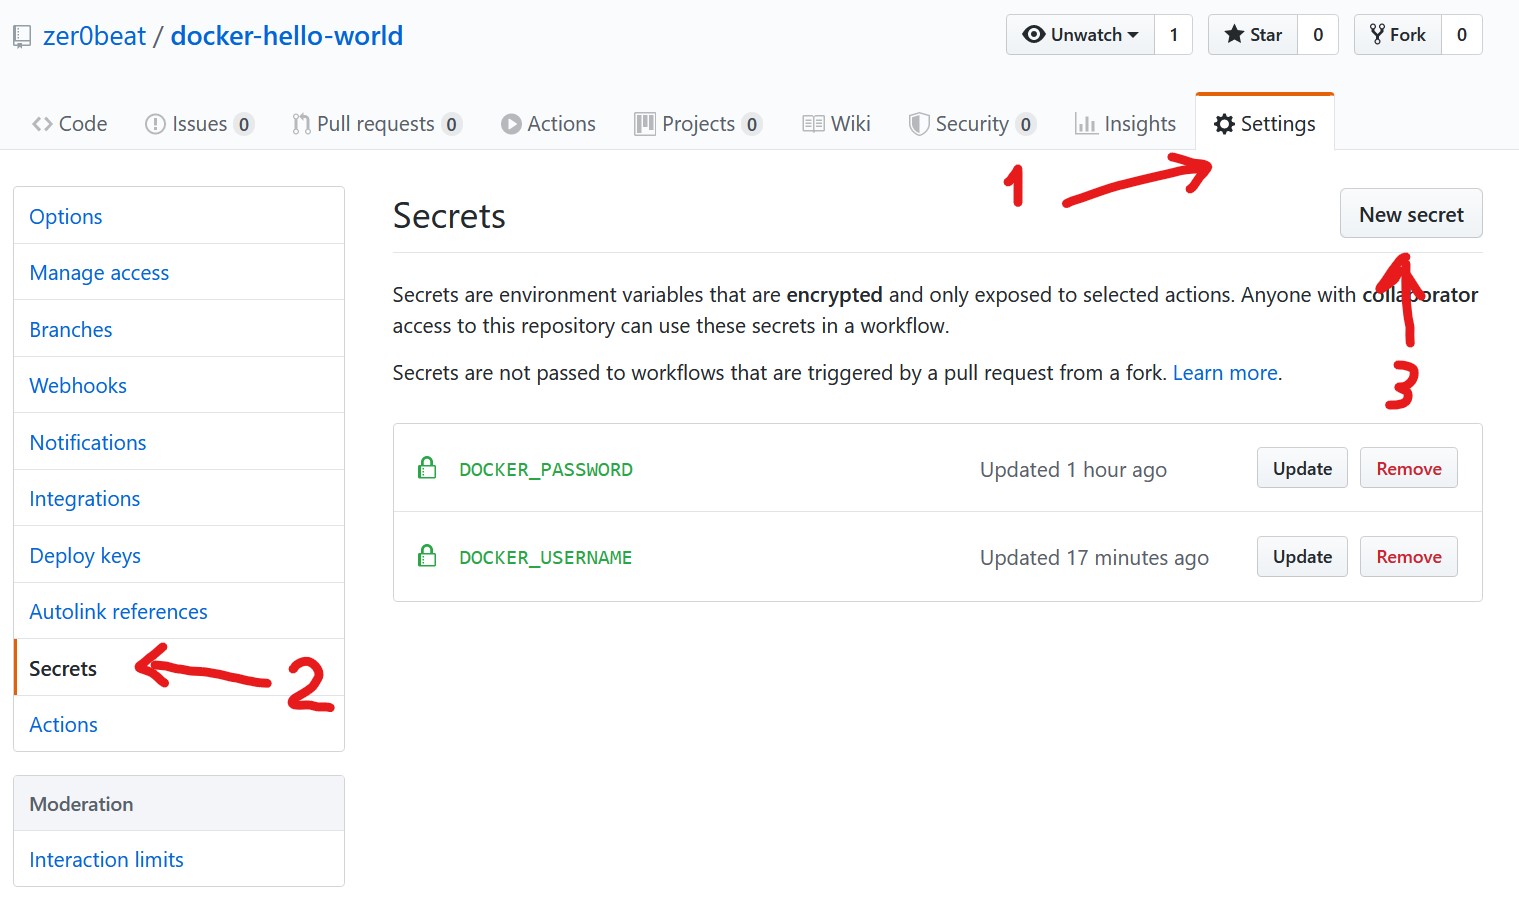
Step 4: Add secrets in the Github repository
Before pushing this workflow into Github, we need to create DOCKER_USERNAME and DOCKER_PASSWORD secrets. The values of these secrets are the credentials of the Dockerhub account. You can create those secrets on your Github repository, on Settings -> Secrets -> New secret.
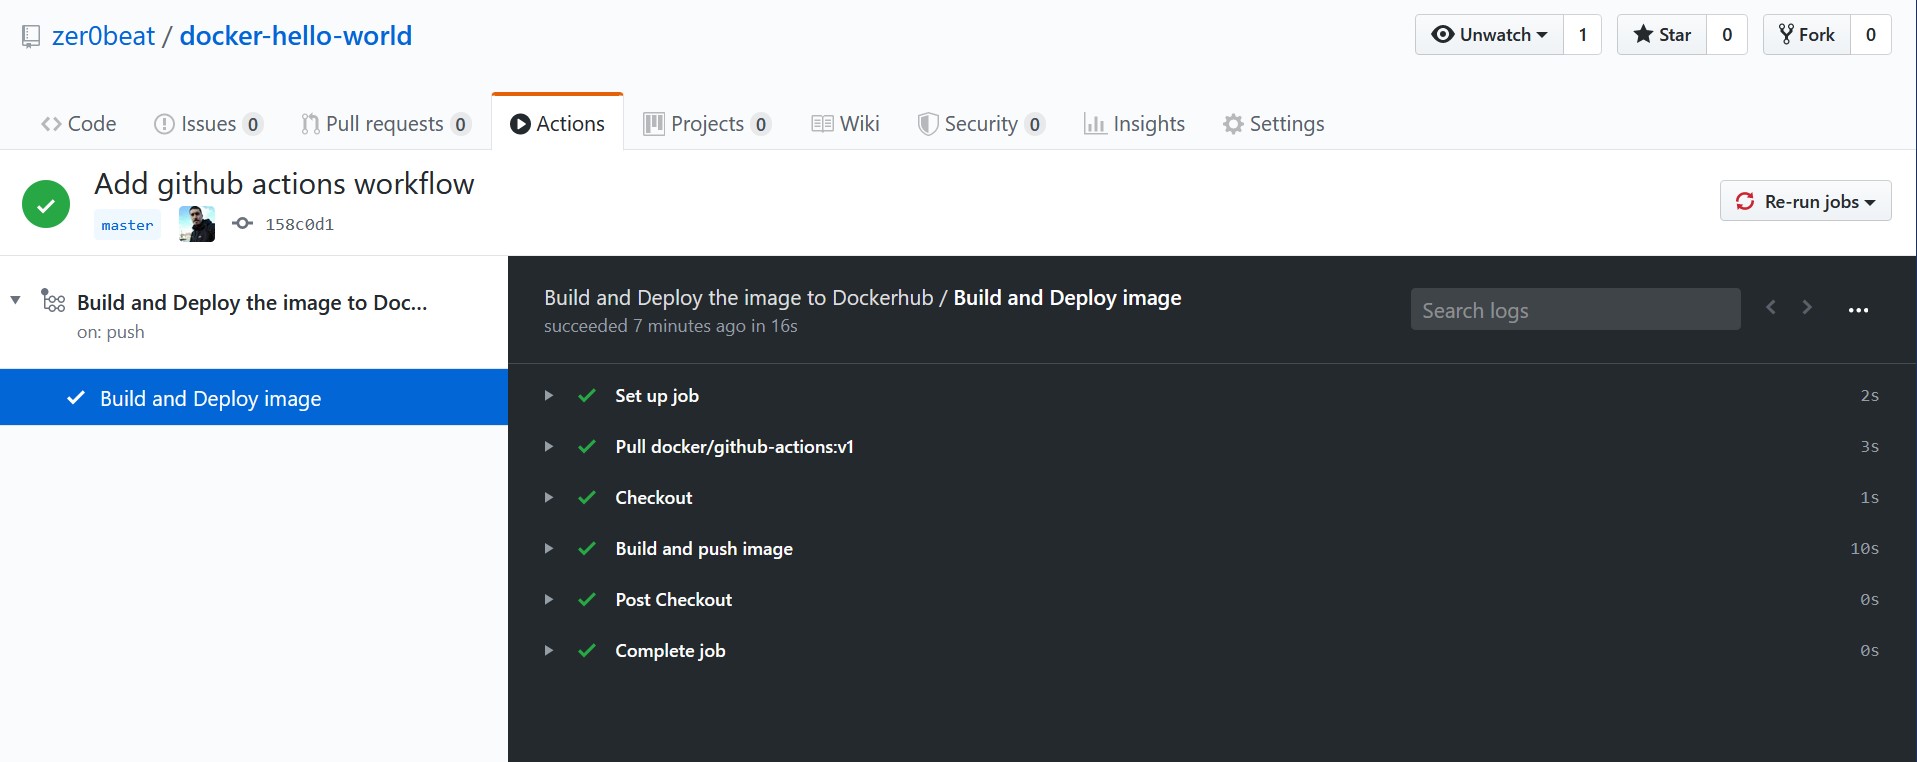
Step 5: Build and deploy the Docker image
Finally, we can push the workflow definition into our Github repository and the magic happens! You can see your actions running on the Actions section.
That’s it!
At this point, I encourage you to iterate your Dockerfile and Github Actions in order to build a more complex workflow with, for example, testing steps. You can find all the code on this GitHub repository with the code explained on this post and the Dockerhub repository with the Docker image.
I hope that you find this post useful since it is as a great way to start playing with Docker and Github Actions.